Friday, September 14, 2012

Bouncy - Bouncy - Bouncy

Well this has been a week of bouncing around like a rubber ball.  
I had a perfectly good plan of action -- try to re-purpose the florals that didn't work in the D9P, finish the challenge quilt top out of the fabric line you see above, clean up the quilt mess that has exploded in my quilt room.   A good plan.  And then this happened:
My-niece-the-quilter came to visit and brought more goodies than should be allowed.  The tote had strips and strips -- yards and yards of strips.  The bag had 1" cuts and some selvages (one addiction I don't have), and a few other scraps.
I love her good taste in fabric!  Modas.  Batiks.  Sock monkeys.  Kaffe.  The list goes on.....
Did I mention a jelly roll of batiks that are pre-cut to 10.5" and pinned together?  WHAT IS SHE THINKING?
My head has been bouncing like a rubber ball since all this came to live with me.  I had already cut the circles that you see above out of the balance of the challenge fabric (that was instead of finishing the challenge quilt which I decided needed 8 more blocks).  

But, I kept being distracted by the batiks.  I mean really distracted!  I have never had a jelly roll of batiks and these colors are incredible.  This is the perfect chance to try Wanda's (Exuberant Color) tutorial on separating lights, darks, mediums.    Wanda is a master (mistress?) on value and you will love reading her blog and learning from her if you're not already a follower.
This is my design wall after bouncing around.  A few circles from the challenge fabrics led me to think about my shirts and what a circle quilt from the plaids/stripes might look like so I made a block.  I had the templates out anyway, right?  The workmanship is not the best but I think I like it and believe I could get king sized quilt out of just sleeves -- never mind the backs and fronts.
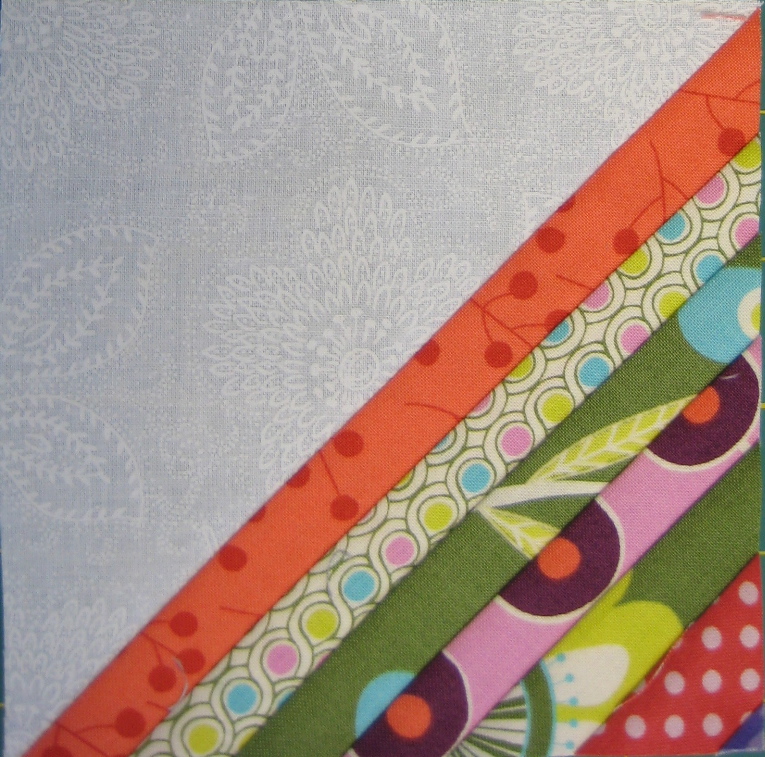
I also made two practice string blocks from the 1" goodies -- I think this will make a great donation quilt for a child.  And these are very different fabrics from my normal stash. How can you work on these and not smile?  They are cut at 5.5" to finish at 5".  Aren't they the cutest?
And, because I had to go a funeral three hours away in the beautiful Appalachians, I decided to take a break on the way home and see if I could find a companion fabric (besides black or another solid) for my pink FQs that was my birthday gift from my-niece-the-quilter.  I love this -- it works with the light salmon on one end of the spectrum and the deep pink on the other.  

What a week!  I love the fabrics but I honestly don't understand gifting such a treasure trove.  This young woman buys good stuff -- and I've been telling her since before she was born that I was her favorite aunt.  I think she believes me, don't you?  And -- to add more joy and anticipation to the future quilting here at iquiltforfun -- my-niece-the-athlete has decided she wants a large queen out of batiks.  I can't wait to go shopping with her to see what she selects or what jelly rolls she decides on.  She's doing lots of research and will pick the fabric and pattern.  I get to the the cutting and sewing and quilting.  I love my girlies!

I hope you have had a wonderful week full of good quilting surprises and family that loves and appreciates you!  I certainly have.   

Jan

Friday, September 7, 2012

Windham Fabrics -- we need to talk!

Let me start by saying I love Windham Fabrics.  I have bought yards and yards of them.  And the fabrics used to make this quilt definitely taught me more lessons than I wanted to learn!
This is Waffles by Aardvark Quilts.  I love the simplicity of her designs and the clarity of instructions.  I made it about two years ago and finally quilted in when I went to see MacQuilts in the spring.  The fabrics are the hand-dyed Gees Bends solids that I paid a pretty penny for several years ago at the Chicago International Quilt Festival.  The fat quarter bundle had about 20 fabrics in them -- all neatly tied up.
I really liked the shading and coloration of many of the shades and they reminded me of Cherrywoods (YUM!).
BUT -- when I opened them up and started to think about what I wanted to do with them -- I was in for a not-so-great surprise.  The fold lines on about half the fat quarters had offset and had a faded look.  And not just a little bit -- a whole lot.  And when I say "fold lines" -- these were not at the edges where sun/light might have caused them -- they were in the bundle where the FQs had been folded and compressed against another. They actually mirrored the lines of the actual fold of the fabric.  I've never seen that before and I hope never to see it again.
Here are some leftover scraps and I've put pins in the discolorations in case you have trouble seeing them.  I was beyond not happy when I saw this and how many fabrics were effected.  Some to the point that I couldn't cut enough strips to make a block.  I know this was not the fault of the quilt shop and I believe they were not aware of the problem.  They are very reputable and were always my favorite booth at the quilt show each year.
When I saw the offsetting and started researching how to handle them before I did anything else -- there wasn't much out there.  There were lots of comments from other quilters who talked about bleeding and washing them with Retayne beforehand. I particularly remember one quilter saying that she was washing her red fabric when the water splashed on her white blouse and it looked like she had cut herself!  Really?

I ended up washing similar colors in small loads with Retayne and color catchers and watched the rinse water.  For those that had a lot of color in the final rinse, they got to go back through the same process one more time.  I also checked the FQ bundle that mom22smartchix bought and hers were equally bad so it wasn't just mine.  Small comfort in that.

I don't know anything about hand-dying, don't know the proper terms, don't know what may have gone wrong but I do know that this was not a good experience - nor typical of Windham Fabrics.  Interestingly, if you were to buy the fabrics today, they come with a suggestion that each color should be washed separately and line dried!  

Fingers crossed for the final washing now that the quilt is finished!

I hope your week has been full of good surprises.  Jan

Saturday, September 1, 2012

Finally Finished -- Hurray!

I am so so happy to say that I finally forced myself to put everything up and get out my Orca Bay (Bonnie Hunter mystery from last winter) and sew down the binding.
Because I have fallen out of love with this quilt, I had the binding sewn on and just decided to sew it down on my machine rather than by hand.  I want it over and put up.

I'm hoping I will love it more one of these days.  That's what happened with this quilt -- it was also a mystery and I got weary of it, didn't like my color choices, and put it up.  I later needed a quilt for a friend, pulled it out, and decided it wasn't half bad.  I'm hoping for the same thing with Orca.  Time will tell -- literally.
In addition to finishing this, I finally started the MacQuilt challenge with fabric that was gifted in honor of Mom22SmartChix's birthday challenge.  We are to have our tops done by October (next month!).  I have 56 blocks made, on the floor for final adjusting, and should be able to meet the deadline if I keep paying attention.
Details about the challenge fabrics was in this post -- there are 9.5 yards (I miscounted originally) -- and I hope to make two lap sized quilts with different patterns.  Interestingly, this is a fabric line that reads as solids but is a directional print!  That means I would be itchy if I tried to do triangles.  Would have made me nuts to have lines going different directions -- I had enough problem keeping the directions straight with squares.

I also finished two charity quilts and they are quilted, bound and ready to be delivered next week.  That is always a relief as I try to make two each month (other than a one month sabbatical in August).  I did free motion stippling on these which makes me tense beyond words.  I kept having a bit of drag on my lucite/plastic quilting table that fits my machine.  I was hesitant to wax or polish it -- any advice from anyone out there on what to put on there to give me as much 'glide' as possible?  I'm happy the backs (flannel) don't show the herky-jerky stitching in a few places.  I know these are the perfect size to practice on in order to improve my free motion quilting.  You can only do so much on a practice sandwich.
The icing on the cake is we have four men working diligently digging up our back yard for a new patio.  This will be great eventually.  It is not great now.
I hope you are loving whatever project you are working on!  Jan


Friday, August 24, 2012

Our Little Guy....

This may be a long post -- forewarned is forearmed!
This cute little fellow is our only grandchild who we went visit in Canada earlier this month.  While we were there, we were able to give him his gifts for his second birthday as well as his birthday quilt.  How much fun is that!
This was made following the directions in Tonya Ricucci's book, Word Play Quilts, and referencing some of her blog posts.  I have to say this was absolutely one of the "funnest" quilts I've made.  You really only need a ruler to square your blocks once you learn to cut generous strips.  I finally learned to make the outside background strips big enough to be able to square up the blocks and still allow for a seam allowance.  Blocks were not made to a specific size...I just started laying them out and if I needed to make one a bit bigger -- I added a strip of a complementing color.  Did I mention this was fun?
I will say that I never quite got my "N's" exactly right.  As you can see here -- the lower case "n" is pretty good here -- the upper case is not.  In some cases, the lower case "n" looks like it's backward because of my cutting angle.  In that case, I made sure the "f" was clearly lower case to make sure it was "alphabetically" correct.  :-)
In order to have a bit more fun with the back, I ordered five FQs from Spoonflower.  What a great business model.  I won't go into a lot of detail here but if you don't know about them, it's worth hearing their story and seeing what they offer.  I was able to scan their database and order the FQ in science-related fabrics (periodic table, DNA, elements, flame test, and molecules).  These were not for little Finn.  They were really in honor of his parents who are both microbiologists.
I wasn't able to get to Chicago to quilt this so I had to suffer through with some great variegated Valdani thread!  I didn't want a lot of quilting as the words are the stars so it went fast and holds it together.  Definitely not anything fancy.
As you might imagine, custom printed fabric is not cheap so I had to "make do" on the back and maximize the science fabrics!  You've actually seen the back through the pieced wool batting in this post.
As a bonus, since I had to fussy cut the periodic table so it was whole, I was able to salvage almost a complete one (roman numerals are missing at the top in case you aren't a chemist) and create a mug rug for our son.

I will definitely make another quilt with letters -- maybe all Christmas words?  Or family names?  Or friends' names?  I'm not sure but I have lots of wonderful solids and scraps and they will need a home one of these days.

When I look at finished quilts in the past year or so, this seems like a great quilt to enter in Amy's Creative Side and her semi-annual Bloggers Quilt Festival.  It meets all the criteria (it's actually quilted -- I have way too many tops that need attention) and I'll put it in the baby section.  If you have never spent any time looking through her festival, you are in for a treat.  Check out some of the best of the best of the blogging world!

I hope you are working on your "funnest" quilt.  If you're not -- check out Tonya's book and see if this might not be just the ticket for learning something new and creating a one-of-a-kind quilt!

Jan


Saturday, August 18, 2012

It Takes a Village

It's that time again -- Amy has her fall edition of Blogger's Quilt Festival active for a week, starting today.  If ever you wanted to see an encyclopedia of quilt goodness, it's worth taking a stroll through all the submissions.

I am going to submit my "It Takes a Village" because of what it means to me.  I love this quilt.  I love the women it represents.  I love to quilt.  

Seriously -- take a minute and walk through the incredible quilts and stories over at Amy's Creative Side!

***************************************************

I am a scrap hound.  I admit it.  I like it.  I profit from it!
I call this quilt "It Takes a Village" for a very special reason.  Only about 40% of this quilt is from my scraps.  The rest have come from my friends in the village where we lived outside Chicago.  It's all batiks and I haven't done much with batiks in the past few years.   A few of them, however, work mainly in batiks (to my advantage, I'd like to say) and aren't particularly fond of small scraps and using them up (to my advantage, I'd like to say!!!!!).

When we would get together to sew, it was always great fun to find a little baggie of snippets.  Some might be a bit too small to use but many could easily become 1.5" squares or greater.  And there was one particular trash basket at MacQuilts house that was always worth going through if I could get there before the cleaning lady.  My goodness, I've found some great scraps in there.  Tsk!  Tsk!

Even more touching for me have been the times that a package would show up at my door after we moved to Kentucky and there would be baggies of cute little batik goodness in there.  Hence, the name of this quilt.

I did lots of "cutting" for it but not in the usual sense.  I pulled out all my 1.5" squares, some 1.5" strips,  trimmed up all the donated scraps, and started sewing!  This has been such fun.  Between the fabric and the randomness of it, it really was "grab and go" sewing.

The quilt is modeled after Tonya Ricucci's "Lego" quilt that I found on her site about a year ago.  There are a number of posts where she talks about her process and that led to a plethora of similar quilts being made and enjoyed by other quilters.

Basically, these are 10.5" blocks that are set 6 x 6 so the quilt finishes at 60" square.  As I started to lay it out, I wasn't thrilled with the fairly apparent demarcation where all the blocks were coming together vertically, so I changed the setting a bit.  The first row is six 10" blocks.  The second row starts with a half block followed by five 10" blocks and ends with another half block.  That breaks it up a bit.  You can certainly still see the blocks when you look but it's a bit less obvious. The third row is six 10" blocks and so on.

As I laid the blocks out, I actually looked for places where the "logs" were the same fabric end-to-end -- or at least similar.  This is the first time in my quilting life that I wanted same fabrics touching!  That helped break the lines a bit more.  As you can see in the red piece here in the corner, there are two blocks there but the same fabric is a bit of a fooler unless you look closely.

So -- I love this quilt.  It's really not mine.  I made it but the fabric was from special people who are now in Chicago, Iowa, and the Bluegrass area of Kentucky.  My intention (once I get it labeled and washed) is that it goes to them.  It can travel among MacQuilts, CookingMama, Mom22SmartChix, MyNeicetheQuilter, LogCabinQuilter, and ShirasGram.  They can keep it as long as they want (years!) and then pass it on to the next one.  I certainly don't need it -- I've had my joy in looking at the fabric, playing with them, remembering the person that shared them, and often recalling the project they were used in.  Aren't quilting friends the best?

I would absolutely make this quilt again.  It's a great way to use those 1.5" strips of all sizes and walk down memory lane.  I hope you're finding time to be creative and remember those you enjoy sharing your quilting with!  Jan

Friday, August 3, 2012

Cabins Built and Garden Being Planted

So many projects -- so little time!  When I think back to what I've had a chance to work on, I'm pretty happy I was able to get all 64 log cabins blocks pieced.  You may remember from last week that these are from a good friend's sons' boxer shorts that they outgrew.  I had never really paid a lot of attention to how a boxer was constructed but there are lots of plackets and small pieces of fabric.  In order to make the most of available fabric, this ended up involving a lot of individual cutting of one "log" at a time.
You can see the layout here.  I've laid it out on a sheet to try to minimize snippets of thread on the back.  I hate show through when I'm quilting and then find a random thread between the batting and top and showing through a light fabric!  ARGGHHHH!  So, I've starched the fabrics to minimize raveling but decided to layout on a sheet vs the floor since my design wall is too small.  Each block will finish at 7" so the quilt will be 56" x 56" which is a decent size for a lap quilt.  I'll back it with a great chocolate minkee knockoff to make it extra cozy.
And, I couldn't help myself and had to finish cutting the squares for my disappearing nine patch out of all my florals.  I'm hoping this works.  Each square is cut 3" and my 3" x 18" ruler was a lifesaver for the cutting.  It was a lot of ironing, starching, and cutting.  And, an unabashedly bragging moment is that all the scraps are cut into squares or strips and put away.  Happy to have that done at the same time.
Since I'm going to do a dark in the middle, mediums on the corners, and lights in between, the piles above are divided in the appropriate value.  I have no idea how many I have nor how many I need but I'm thinking I should have roughly four times as many mediums/lights as I do darks.  That's not quite the ratio here so I will play it by ear.
This is the proverbial test block (actually, the second).  The first I did had the mediums and lights switched and I wasn't sure about that.  And let's be realistic, when you cut a floral fabric, values are a bit subjective as you can see here in the lower right hand corner block.  No sweat -- I'm going for a mis-mash of happy color.
Here are a few of the blocks that I sub cut and put on the design wall.  Hmmmm.....I don't dislike it but I don't love it -- yet.  The fabrics are such fun and very different from other types of fabric that I normally work with.  And a bin is empty!!!!  This will entail mindless sewing and a lot of it.
Finally, the sky scarf for Mr Iquiltforfun is done.  I mentioned this earlier this year.  I have knit one full row in popcorn stitch everyday since January 9th.  White for snow (or one day of total fog), gray for rainy or overcast, charcoal for stormy, blue for blue (obviously), and blue/white heather for those days when the sky is blue and peppered with white clouds.  You can see the impact of the drought with all the blues at the end vs the gloomier days of winter when I started it.  The last "charcoal" stripe you see in the lower left hand corner was the day of tornadoes that took lives in Kentucky and southern Indiana.  We will never forget that day.

I'm not sure where I'll put my energy for the next few days.  Probably in complete and total anticipation for our trip to Toronto next week.  We are finally getting up to see our son and his family who moved in early June.  We have not seen our grandson in person (thank you Face Time!) in four months.  For all you grammies out there, you know this is way too long to go without a reading a story, playing with Thomas the Train, or getting a hug and and kiss!  I'll probably take my knitting and some handwork and wait about taking my little machine until I get the lay of the land.

I hope you are having a wonderfully creative week and getting hugs and kisses from those you love!  Jan

Thursday, July 26, 2012

Let the Games Begin!

Yet another week of wandering and playing and not really finishing - but planning for sure!
This is another practice block and was remarkably easy and fast.  This is Ricky Tims' "Convergance" pattern and is made from four 15" blocks.   This took three hours start to finish and has only 24 seams. 

I want to make two more of these -- one in just two colors and another with a yard of the most gorgeous and colorful hand-dyed fabric I've ever seen.  It's a generous gift from Ms LogCabinQuilts when she went to hear Ricky and I wanted to make sure I knew how the fabrics would be playing together before I cut into any more fabric.  These are not-so-great fabrics that continue to multiply in the dark and may never disappear from my stash.  I had planned to work on the two color version this week but haven't had the spirit to do it. So, I'll wait. 
I did manage to get the blocks for RRCB assembled.  They went together well and it's just been too hot to take it outside for a picture. So, here's a snippet.  I've gone as far as I can until the borders are done.
And -- here's what awaits on the border.  172 of these little parallelograms must be assembled into the pieced border.  I was pretty far ahead on these and only need to put the final triangle on most of them.  That's the easy part and can be a leaders/enders project.
What's much less exciting is assembling them as you see here for the borders.  I'll plug along at it but certainly do not feel motivated to get this done.  The tote that had this quilt it in is almost empty which helps justify starting another project, don't you think?
That leads us to this little log cabin block and the pile of boxer shorts below.  These were "gifted" by a friend whose sons are 29 and 32 years old -- and these are shorts they outgrew in high school.  How lucky for me!  While boxers don't provide nearly as much fabric as a shirt, there's enough to make a quilt.  It's easy enough to toss the soiled or worn parts and only use the best fabric and not have a lot left over.  No emotional ties here.
So, I made another practice block to see if I like it and I do.  This will finish at 7" and has 1" logs.  I'm thinking 64 blocks set at 8 x 8 will make a decent size snuggle quilt and my goal will be to have it done by Christmas. We'll see -- and that's what leads us to the Olympics.

I think I'll make these log cabins my Olympic event for the next two weeks.  You see an incredible organization on Ravelry with various knitting events that start when the opening ceremonies begin.  I won't be quite so structured, but I'll work on them when I'm watching from my sewing room and we'll see where I am by August 9th when we leave on vacation.  I'm sure I'll play in other areas -- based on the last two weeks anyway -- but I hope to concentrate on cutting and sewing this pile of free fabric!

When I think about the Olympics, I consider this to be two weeks of some of the best our world has to offer!  It is my hope that they will be peaceful and embody the Olympic spirit - both in London and around the world.  If only we could hold on to it after the flame is extinguished.  

What about you, is there an Olympic event in your future?  Whatever the next two weeks bring, I hope it is peaceful and creative!  Jan